Basic Guitar Barre Chord Shapes
Before we learn how to physically play barre chords, we ought to first
understand how they're built so we can put them into the
context of our own music. We can identify several barre chord shapes
as follows...
E Shape
Time and time again, I hear people refer to the E shape/form barre chord as the dreaded "F chord". It's seen as a key milestone after learning your first chords and will likely have a huge impact on your chord/rhythm playing.
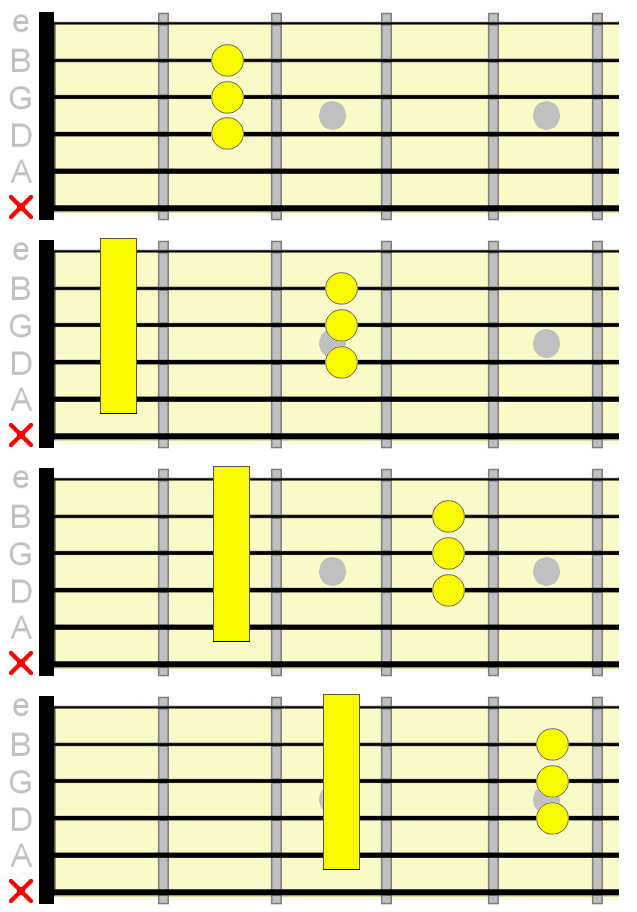
So, what makes it the "E shape"? The sequence below starts off with the E major open position chord, with which I'm sure you're familiar. With it's related barre chord, this E major shape (the finger formation on the fretboard) simply gets moved up to the 1st fret (and beyond), meaning we have to barre our index finger to represent where the nut (or capo) would be in relation to the fretted strings.
Don't try and play anything right now - just observe...
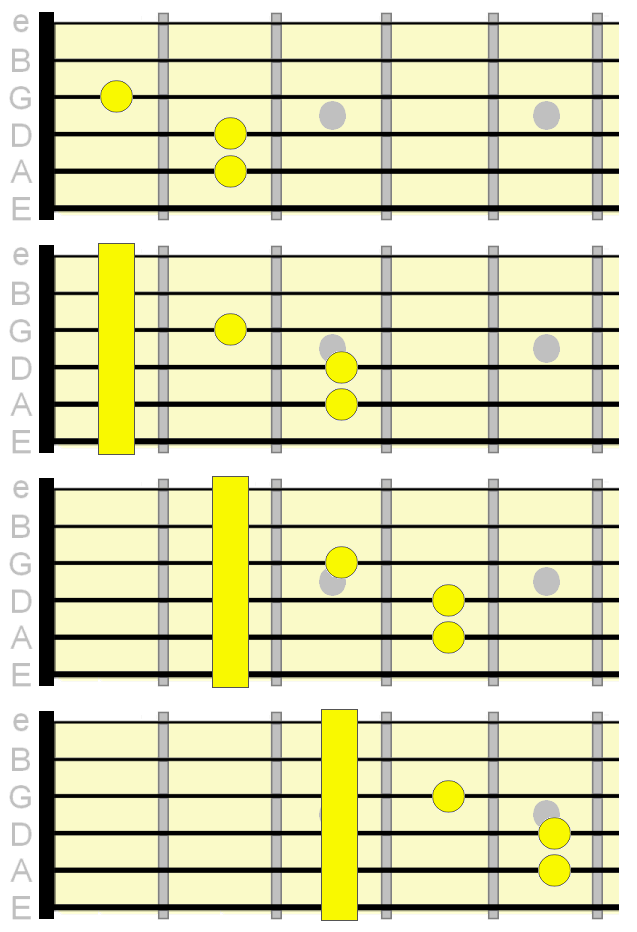
So the barre covers the low E, B and high e strings, whereas the A, D and G strings represent that familiar open E major formation.
That shape can be positioned anywhere up the fretboard depending on the chord you want to play (1st fret = Fmaj, 2nd fret = F♯maj, 3rd fret = Gmaj etc.).
Now take a look at a similar diagram below...
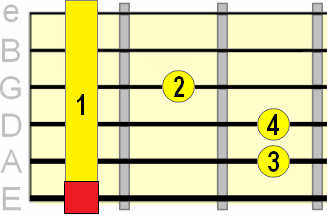
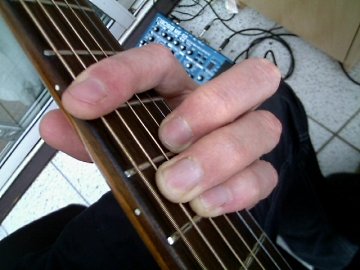
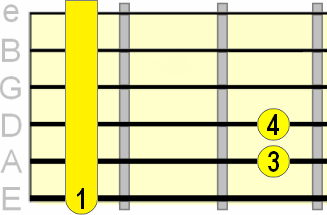
The lowest root note of the E form barre chord (the fretted red square) is always on the 6th string, so if (for example) that root note was positioned at the 5th fret, it would be an A major chord, since the root note would be A. If it was at the 1st fret, it would be F major.
There are higher root notes in the shape, positioned on the 4th and 1st strings, but at this stage it's easiest to identify the root of barre chords by looking at their lowest root note (the bass note if you like), as the rest of the shape is built from that point.
There is also a minor E shape based on the open E minor shape we're already familiar with. All we do is lift off our 2nd finger from the major shape to get a minor chord.
A Shape
Exactly the same principle as above, but this time the barre chord is
based on the open A major/minor shapes.
So this time, the bass root is on the A string. It's the A string root that determines the note we use in naming the chord.
Note:
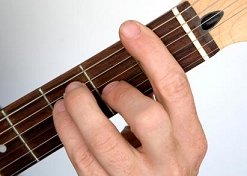
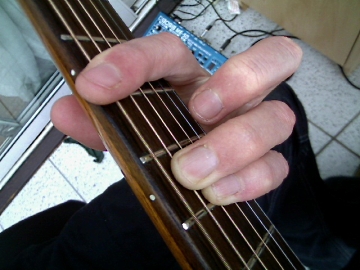
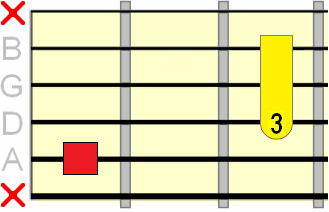
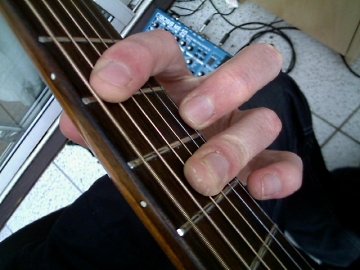
As shown in the photo below, for the major A shape, it's easiest to barre the
2nd, 3rd and 4th strings using your
3rd/ring finger
and leave out the 1st string.
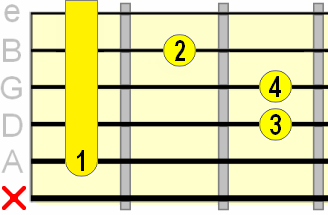
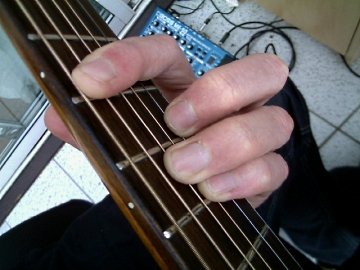
Again, we have a minor A shape based on open A minor. This time we use
the index finger barre as usual...
C Shape (not as important)
Not as commonly used, and more difficult to finger, but still good to know.
You can probably guess
where C shape barre chords come from. That's
right... the open C major chord we learn as beginners.
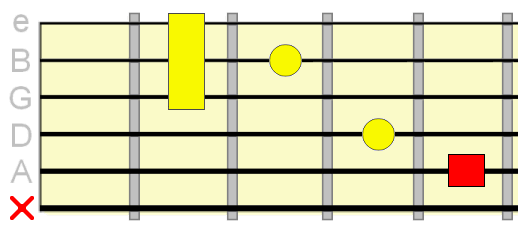
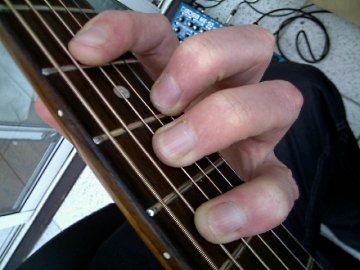
This shape provides us with a slightly different voicing to the A shape, even though it's rooted on the same (5th) string. Unlike the A shape which ascends from the root position, the C shape descends from the root.
Because of the formation of our fingers in this shape, there is no
convenient minor
C shape to learn.
Other Shapes (least important)
Some guitar teachers/players make reference to two further barre chord shapes - D and G. I personally wouldn't spend much time on these.
The full G shape
is a mammoth chord to finger in a barre position
(maybe even impossible for players with small hands), and most often
ends up being cut down to the following variation of the A shape
(notice the familiar in-line formation of the 2nd, 3rd and 4th strings). In
this shape the root is positioned on the 3rd string.
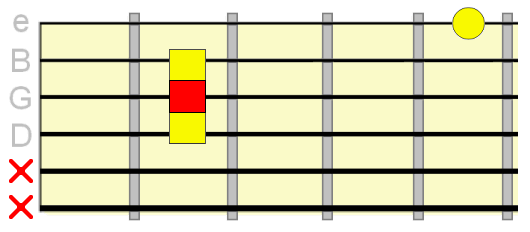
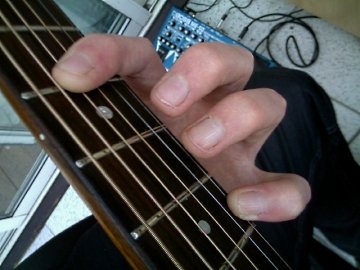
As for the D shape,
it's not strictly a barre chord, since there are
only four strings in the shape, and therefore one finger per string and
no barre required.
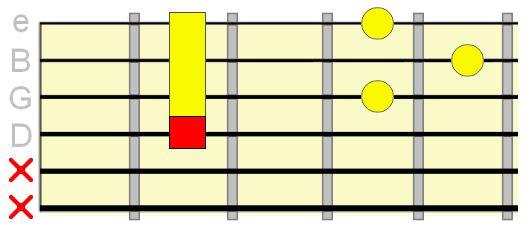
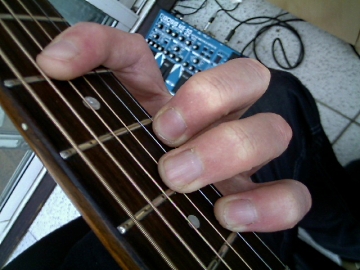
However, it might be useful to barre your index with the D shape (as shown in the diagram) if you want to use techniques such as hammer ons and pull offs in the chord shape and "catch" the string with your barre finger. More on that in another lesson!
And the minor shape...
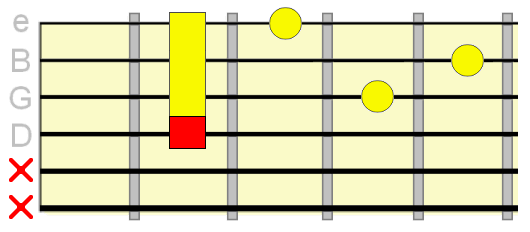
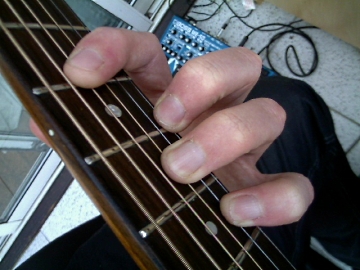
Once you're confident with how these shapes are formed on the fretboard, it's time to get physically confident with fingering them and changing between them and other chords.
Bookmark and reference this page as you go through the next lesson on building finger strength with barre chords.
